You should spend about 20 minutes on this task.
The diagram below shows the process for making a water clock.
Summarise the information by selecting and reporting the main features, and make comparisons where relevant.
You should write at least 150 words.
MODEL ANSWER>>>
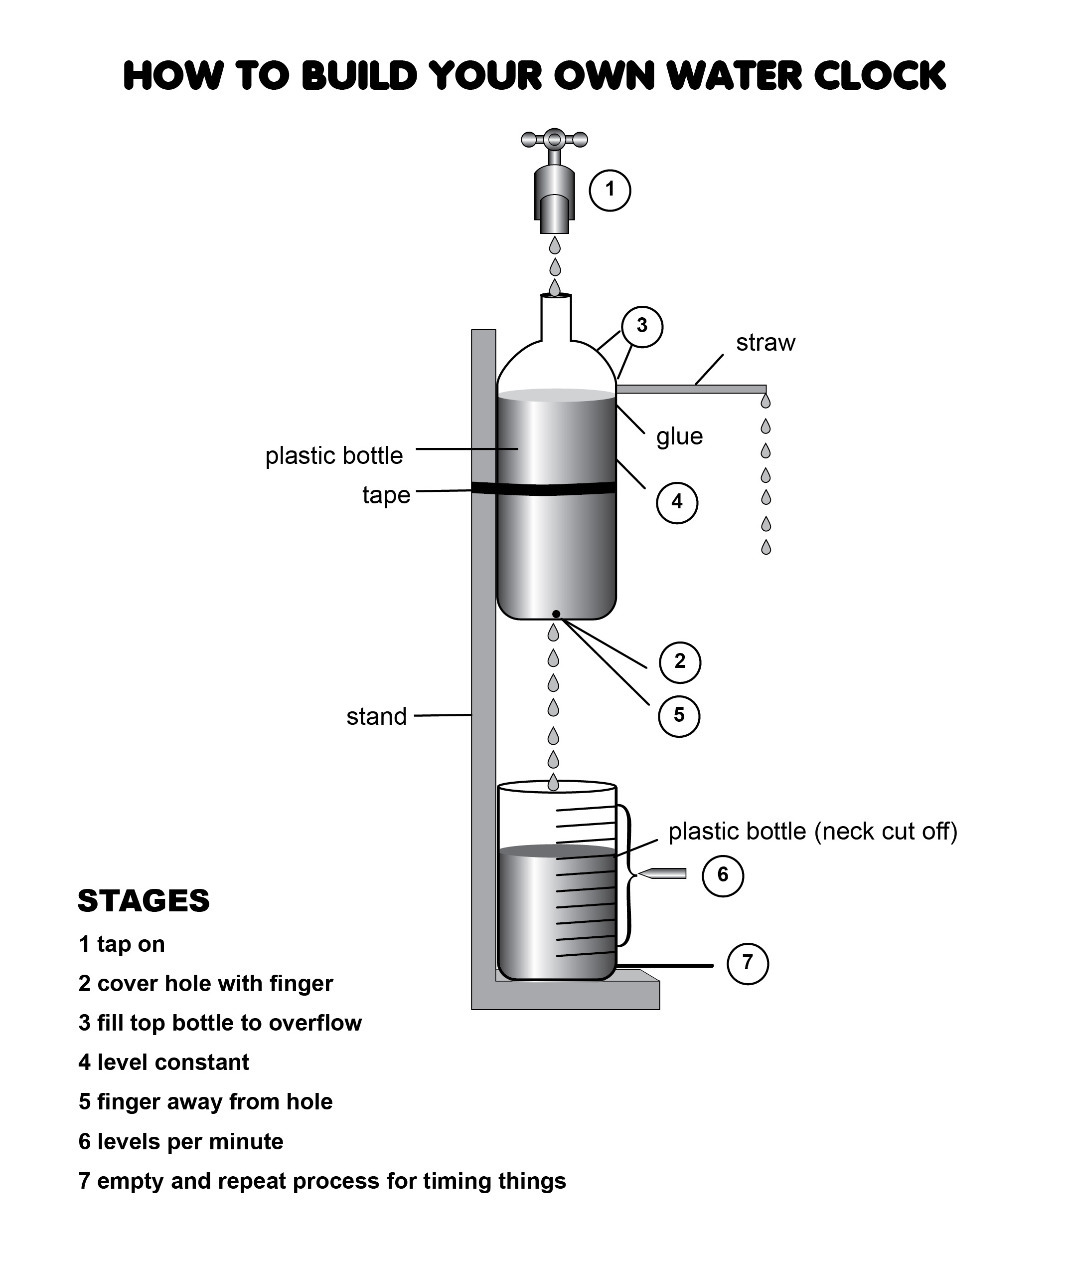
The given illustration shows the method of setting up an individual water clock.
Overall, it is clear that the whole process involves seven steps and the equipment needed are a stand, two plastic bottles, a tape, a long straw and glue.
In the first stage, water droplets are allowed to fall from a tap to the plastic bottle, with a small hole at its bottom. It is to be noted that the hole of the bottle, which is taped at an ideal level at the top of the stand, remains closed with a finger until the water reaches the desired level. Once it reaches the desired level, the finger is released. Water exceeding this level is released through a long straw, which is glued at the top of the bottle.
As the finger is released, the water is allowed to drop into the second bottle with an open neck, placed at the bottom of the stand. Water levels are marked on this bottle every minute with a marker for the calculation of time. Once this bottle is full, it is emptied, and the process continues.
Word count: 185